Spostidian is one of the best notes blogging applications today. It provides a strong experience based on storage with first local storage. However, there is one problem: the official synchronization feature costs about $ 8 per month. What if I told you that there is a way to synchronize your notes via multiple devices completely free? In this guide, I will walk you through a way using GitHub and Git that allows you to maintain your synchronous notes without spending ten cents.
What will need
You may feel that you need to do a lot of things, but don’t worry; In a perfect scenario, you will need about 10-15 minutes and these things:
- Jaithb and warehouse account
- GitHub Access Tokeen
- SSH (optional)
- I missed
- Lush
- Get assistant program for obsidian
- Ishone app for iPhone
- Obsidian app for iPhone
Step 1: Create a Github account and a warehouse
Jaytab It is a platform based on the cloud used mainly to develop software, but it can also be used to manage projects and personal files-including Obsidian notes.


A GIT warehouse (Or RePO) is a storage space where GIT tracks all changes on a set of files. It records modifications, allowing you to return to previous versions, cooperate with others, and synchronize your files through different devices. In the context of Obsidian, the GIT warehouse helps store and synchronize your notes while tracking all modifications.
- Go to GitHub.Com, registration.
- Once you log in, click new A button to create a new warehouse.
- Give it a name (for example, “Obsidian-Notes”).
- Make sure to set the warehouse to private So your notes cannot be accessed.
- Click Create a warehouse.


Step 2: Install Git on your computer
If you do not have an installed git, follow these steps:
- Mac: Install Git using HomeBrew with
brew install git.
- Linux: Use
sudo apt-get install git(Debian -based systems) or Sudo Dnf Install GIT (for Fedora systems).
Once installed, open a station (orders or Powershell or MacOS Terminal) and check the installation by operation:
git --version
GIT orders basic
Here are three basic GIT orders that you will use repeatedly:
git status
This explains the current situation of your warehouse. It tells you about the files that have been modified, added or organized for commitment.
git pull
This brings the latest changes from the GitHub warehouse and updates your local warehouse.
git push
After making changes, you need to download them to GitHub using Git Push. This sends your committed changes from your local warehouse to the remote warehouse.
Step 3: Getb warehouse cloning
Now, let’s connect the local Obsidian basement to GitHub:
- Open your station, and go to the folder where you want to store your notes.
- Run the next command, and replace Repo-URL entitled URL for GitHub:
git clone YOUR-REPO-URL
- This will create a local folder linked to your GitHub warehouse.

Move your spy notes to this folder until they are ready to synchronize.
Step 3. How to get the classic GitHub icon
GitHub has neglected the GIT password -based authentication. Instead, it requires you to use a Personal access code (PAT)Which provides a safer way to ratify.
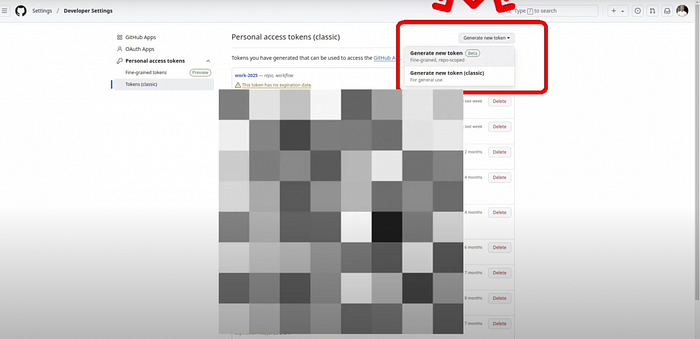
How to get a classic Gybphep icon
Go to the Gabbab developer settings:
Select the expiration and permissions:
- Choose the expiration date or set it on No end (Understanding for Security).
Select the necessary domains:
- Repo → To reach private warehouses.
Create and copy the distinctive symbol:
- Click Getting the distinctive symbol and Copy immediately.
- GitHub will not display it again after leaving the page.
Use the distinctive code for GIT authentication:
- When he is demanded b password In Git operations, paste the distinctive symbol instead.
Step 4: SSH preparation for ratification (optional)
To avoid entering your password every time you coincide, you can set up SSH authentication:
- Create a SSH key by running:
ssh-keygen -t ed25519 -C "[email protected]"
cat ~/.ssh/id_ed25519.pub
- Go to Jabbap, move to Settings> SSH and GPG keysAdd the key copy.
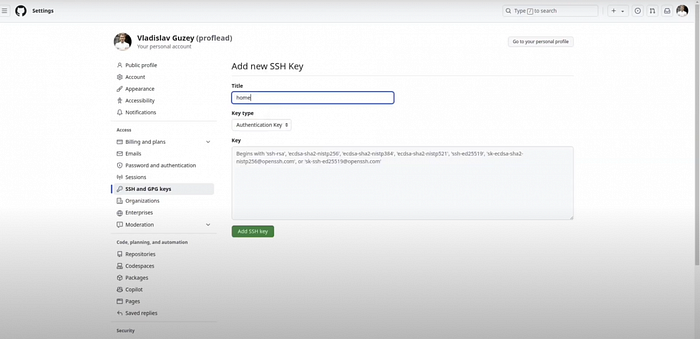
Now, your system will automatically believe with GitHub.
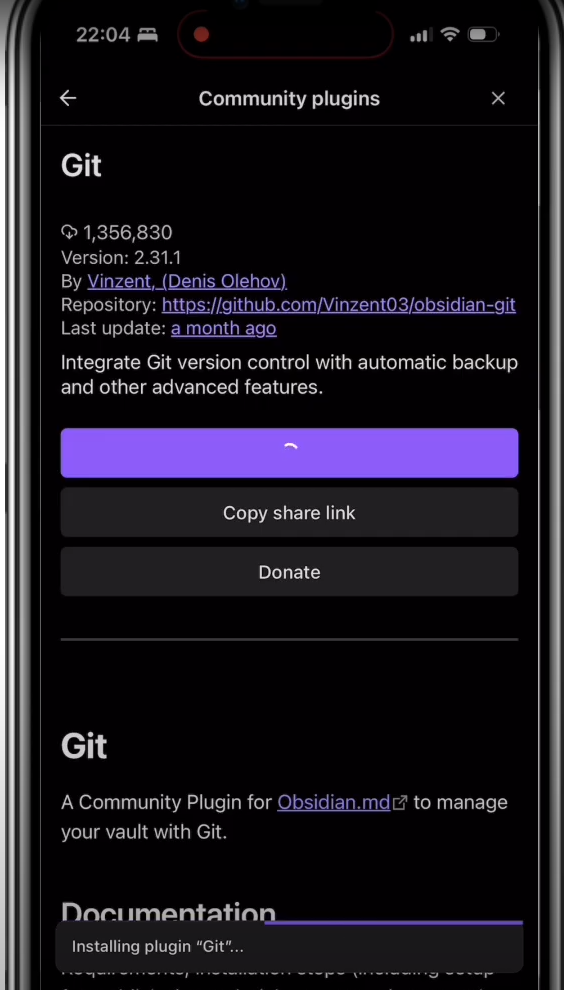
Step 5: Prepare the additional component of Git in Obsidian
I assume you already have the Obsidian application, which is why I will not cover the installation process here. I will only show you the fast steps to install the GIT additional component.
Obsidian has an additional component that makes GIT easier to synchronize:
- Munjidi opened, and moved to Settings> Community Additions.
- Look for “Git”, and install it.
- maybe Automatic and synchronous commitment (Set a break, for example, 5 minutes).
- maybe Startup withdrawal To prevent conflicts.


Now, whenever you edit the notes, Obsidian will automatically with GitHub.
Step 6: Advocating notes on the mobile phone (iOS, iPhone, iPad)
Strong on the mobile phone is slightly more complicated but still executed.
- I fixed Lush From the application store.
- I fixed NestPerist application that allows you to run Linux orders.


apk add git
- Create your Obsidian notes folder:
mkdir obsidian
mount -t ios . obsidian
- Files will appear. Choose the folder with local cellar.
- Then use the following orders:
cd obsidianrm -rf .git clone YOUR-REPO-URL .
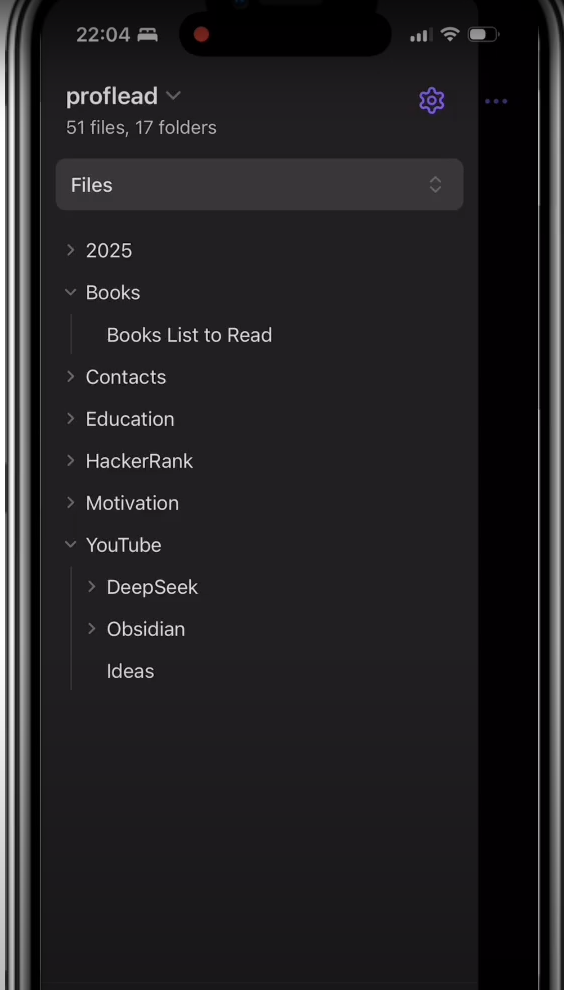
Once this step is completed, you will see your notes in the Obsidian application.
Step 7: Install the additional component of Obsidian Git on iPhone
The last step in the tutorial – the assistant program Git Commonity.
-
Open a plug.
-
Go to Settings> Community Additions.
-
Click Browse and search for Git Sbosidian.
-
Press the installation, then enable the auxiliary program.
-
Prepare a timetable for an automatic commitment (for example, every 5 minutes).
-
Empowering clouds on startup to synchronize changes when Obsidian opens.
Educational video
If you are struggling with steps, I recommend watching my detailed tutorial.
conclusion
While it takes some preparation, as soon as it is done, it works smoothly. If you find this guide useful, tell me the comments, and do not hesitate to ask any questions!
Cheers! 😉


